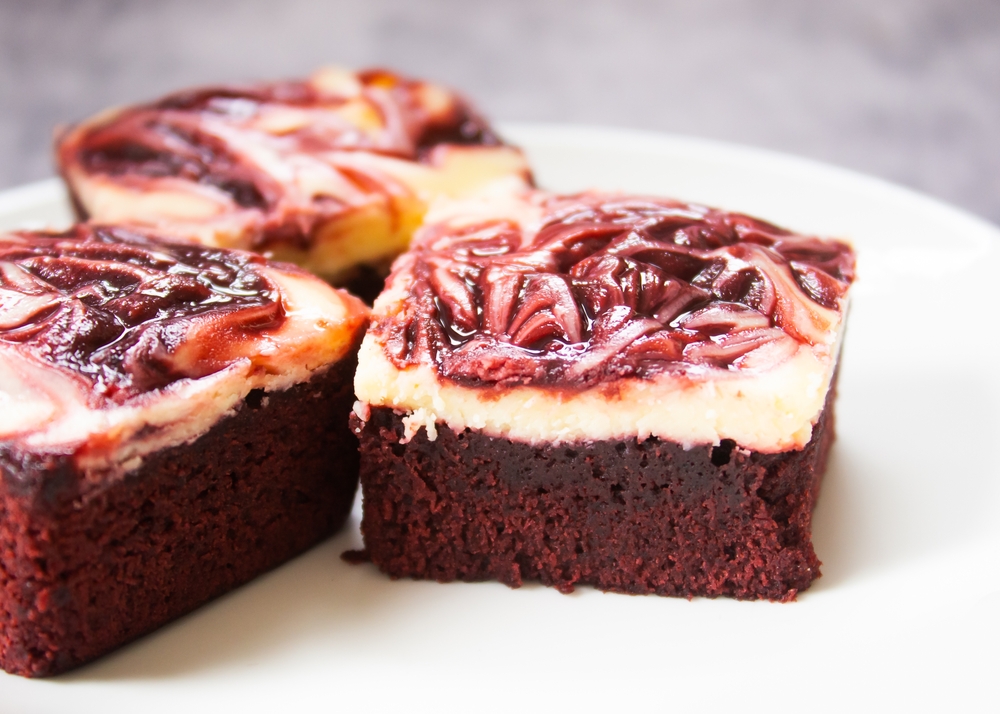
There are brownies, and then there are red velvet cheesecake brownies—the kind that make everyone pause before taking the first bite and then quietly reach for another.
These gorgeous treats combine a rich, fudgy red velvet brownie base with a creamy, slightly tangy cheesecake swirl. The result is somewhere between a brownie, cheesecake, and classic red velvet cake, all in one easy-to-share dessert. They’re especially perfect for birthdays, potlucks, holiday gatherings, Valentine’s Day, or those “I should bring something impressive” moments.
Recent versions of this dessert continue to favor a fudgy brownie texture, full-fat cream cheese, and a dramatic swirl rather than a completely covered cheesecake layer.
Why You’ll Love These Brownies
They look fancy but aren’t difficult. You only need two mixtures and a simple swirling technique.
The texture is irresistible. The brownie stays rich and fudgy while the cheesecake layer adds a soft, creamy contrast.
They’re party-friendly. One square pan gives you plenty of bite-sized pieces, making them ideal for sharing.
They’re easy to customize. Add mini chocolate chips, a little espresso powder, or extra vanilla if you want to put your own spin on them.
Red Velvet Cheesecake Brownies
Ingredients
For the Red Velvet Brownie Layer
- ½ cup 113 g unsalted butter, melted
- ¾ cup + 2 tablespoons 175 g granulated sugar
- 2 large eggs
- 1 teaspoon vanilla extract
- ½ teaspoon white vinegar
- 1 teaspoon red gel food coloring or enough to reach your preferred shade
- 3 tablespoons 20 g unsweetened cocoa powder
- ¾ cup 95 g all-purpose flour
- ¼ teaspoon salt
For the Cheesecake Swirl
- 8 ounces 225 g full-fat cream cheese, softened
- ¼ cup 50 g granulated sugar
- 1 large egg
- ½ teaspoon vanilla extract
Instructions
-
Preheat your oven to 350°F (175–180°C). Line an 8- or 9-inch square baking pan with parchment paper, leaving some overhang on the sides. This makes it much easier to lift the cooled brownies out later. Melt the butter and let it cool slightly.
-
Whisk the melted butter and sugar together until combined. Add the eggs, vanilla, vinegar, and red food coloring, mixing until the batter looks smooth and evenly red.
-
Add the cocoa powder, flour, and salt. Stir just until no obvious streaks of flour remain. Avoid overmixing, since that can make brownies less tender.
-
Scoop about ¼ cup of the brownie batter into a small bowl and set it aside. You'll use this later to create those beautiful red ribbons across the cheesecake layer. Pour the remaining brownie batter into your prepared pan and spread it into an even layer.
-
In a separate bowl, beat the softened cream cheese and sugar until smooth. Add the egg and vanilla and mix until creamy and lump-free. If your cream cheese is still cold, give it a little more time to soften. Room-temperature cream cheese blends much more easily and helps prevent lumps.
-
Spoon the cheesecake mixture over the brownie batter and gently spread it across the surface. Drop small spoonfuls of the reserved red brownie batter over the cheesecake layer.
-
Now comes the fun part. Take a butter knife, skewer, or chopstick and gently drag it through the layers to create a marbled pattern. Don't overdo it. A few deliberate swirls will give you distinct red-and-white ribbons. Too much swirling can turn the top into one uniform pink layer.
-
Bake for approximately 30–35 minutes, or until the cheesecake looks set and the center has only a slight jiggle. A toothpick inserted into the brownie portion should come out with a few moist crumbs rather than completely wet batter.
-
Remember that baking times can vary between ovens and pan sizes, so start checking toward the lower end of the baking window.
-
Cool Before Cutting
-
Let the brownies cool completely in the pan.
-
For especially clean slices, refrigerate them for about an hour after they've cooled. Then lift them out using the parchment paper and slice into squares.
-
For the neatest party presentation, wipe your knife between cuts.
Tips for Perfect Red Velvet Cheesecake Brownies
Use gel food coloring for a deeper red. Gel coloring is concentrated, so you can achieve a vivid color without adding a large amount of liquid.
Don’t skip the cocoa. Red velvet isn’t simply vanilla cake with red coloring. A small amount of cocoa gives these brownies their characteristic chocolate depth.
Use natural cocoa if you want a brighter red appearance. Dutch-process cocoa is darker and can make the brownie base look more chocolate-brown.
Don’t overbake. The brownies will continue to firm up as they cool. Taking them out when the center is just set helps preserve that fudgy texture.
Let them cool before slicing. This is probably the hardest part of the recipe—but cutting into warm cheesecake brownies can leave you with messy slices.
Easy Ways to Make Them Party-Ready
Want to make these brownies look even more special? Try one of these simple finishing touches:
- Sprinkle a few white chocolate chips over the top before baking.
- Add a light dusting of powdered sugar after cooling.
- Drizzle with melted white chocolate.
- Cut them into small squares for a dessert platter.
- Add festive sprinkles based on the occasion.
- Serve each square with a tiny spoonful of whipped cream.
You can also make them a day ahead, which is particularly convenient when you’re preparing several dishes for a party.
How to Store Them
Because these brownies contain a cheesecake layer, refrigeration is the safest storage choice, particularly for longer storage or warm conditions. Keep them covered in an airtight container and refrigerate.
For the best texture, let refrigerated brownies sit out briefly before serving so the brownie softens slightly.
They can also be frozen in an airtight container for longer storage. Wrap individual pieces well so they don’t develop freezer burn.
The Final Bite
These Red Velvet Cheesecake Brownies are proof that a dessert doesn’t need complicated decorations to steal the spotlight. The vibrant red brownie, creamy cheesecake and dramatic marbling do all the work.
Make a batch for your next gathering, cut them into small squares, and don’t be surprised when the serving plate mysteriously empties before the party is over.