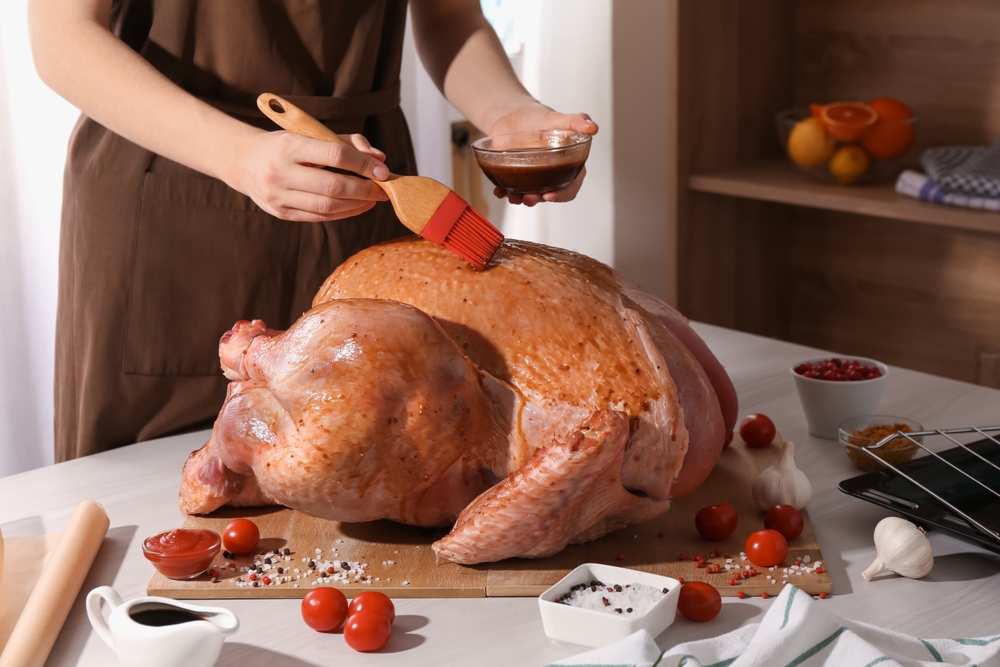
A juicy, flavorful turkey starts before it ever reaches the oven. Brining helps the meat stay moist and adds delicious seasoning throughout, but handling a large bird, gallons of liquid, and a crowded refrigerator can quickly turn your kitchen into a disaster zone.
The good news? You don’t need a giant bucket, a complicated setup, or a sink full of salty water to get great results. With a few simple preparations and the right container, you can brine your turkey neatly, safely, and with much less stress.
Whether you’re preparing a holiday feast, hosting a family dinner, or cooking turkey for the first time, these practical tips will help you get the flavor you want without the cleanup headache.
Why Brining Makes Turkey Better
Brining involves soaking turkey in a saltwater solution before cooking. The salt changes how proteins behave in the meat, helping it retain moisture during roasting. The result can be a more tender, juicy turkey with well-seasoned meat.
There are two main ways to brine a turkey:
- Wet brining: The turkey sits in a mixture of water, salt, and optional flavorings.
- Dry brining: Salt and seasonings are rubbed directly onto the turkey, which rests in the refrigerator without added water.
Wet brining is a great option if you enjoy adding flavors such as garlic, herbs, citrus, and peppercorns. However, if your biggest concern is avoiding spills, dry brining is often the easiest choice because it requires no bucket of liquid.
What You Need for a Mess-Free Turkey Brine
Before getting started, gather everything in one place. Having your supplies ready means fewer trips across the kitchen while handling a slippery turkey.
For a wet brine, you’ll need:
- One fully thawed turkey, preferably 10–14 pounds
- A food-safe container large enough to hold the turkey and brine
- A leakproof food-safe brining bag, if desired
- A rimmed baking sheet or roasting pan
- A large measuring jug or pitcher
- Salt and your preferred seasonings
- Paper towels for small drips
- Refrigerator space that can maintain 40°F (4°C) or below
A brining bag placed inside a sturdy container is especially helpful. The container supports the bag, while the bag reduces the chance of liquid escaping if a small spill occurs. Always check that the bag is designed for food contact and is suitable for brining.
Step-by-Step Guide to Brining a Turkey Without the Cleanup
1. Choose the Right Container
The easiest way to avoid a kitchen flood is to pick a container that fits your turkey without leaving too much extra room.
A large food-safe stockpot, dedicated brining bucket, or brining bag inside a roasting pan can work well. The turkey should fit comfortably, and the container must be strong enough to hold the weight of both the bird and the liquid.
Avoid using ordinary household garbage bags, non-food-safe containers, or containers made from reactive metals. If you use a bag, place it inside a sturdy pan before adding the turkey or liquid.
2. Make the Brine Before Adding the Turkey
Mixing the brine separately helps prevent salt from collecting unevenly and makes the process easier to manage.
For a basic wet brine, you can start with:
- 1 gallon (3.8 liters) of water
- 1 cup of kosher salt, using a brand and salt measurement appropriate for the recipe
- ½ cup of brown sugar, optional
- 2–3 garlic cloves, lightly crushed
- A few sprigs of rosemary or thyme
- 1 teaspoon of black peppercorns
Salt crystal size and density vary between brands, so weighing the salt or following a tested recipe for your particular salt is more reliable than measuring by volume alone. The amount of liquid needed will depend on your turkey and container.
Warm a portion of the water to dissolve the salt and sugar, then add the remaining cold water. Refrigerate the brine until it is completely cold before it comes into contact with the turkey.
Important: Never pour hot or warm brine over raw turkey. The bird must remain at a safe refrigerator temperature throughout the process.
3. Set Up a Spill-Proof Brining Station
Place your container inside a rimmed roasting pan before you add anything. This gives you a second layer of protection against leaks.
Set the pan on a low, sturdy refrigerator shelf, away from ready-to-eat foods. Make sure the shelf can support the combined weight and that the container can remain upright without touching other food.
If refrigerator space is limited, consider dry brining instead. Do not leave a turkey on the counter, in a garage, or outdoors to make room in the refrigerator.
4. Add the Turkey Slowly
Remove the giblets and neck from the turkey cavity, following the package instructions. Lower the turkey into the container gently, keeping it close to the opening to avoid splashing.
Pour in the cold brine slowly, using a pitcher rather than lifting a heavy pot. The turkey should be submerged as much as possible. If necessary, use a clean, food-safe plate to help keep it under the liquid.
Seal the brining bag according to its instructions, then check for drips before moving the container. If the bag or container is damaged, transfer the turkey and brine to an intact food-safe setup.
5. Keep the Turkey Cold
Place the turkey in the refrigerator at 40°F (4°C) or below for the time specified by your recipe. Many wet-brining recipes call for approximately 12–24 hours, but the appropriate time depends on the turkey’s size and the brine’s salt concentration.
Do not leave the turkey at room temperature while it brines. If it cannot fit safely in your refrigerator, choose another method rather than leaving it unrefrigerated.
6. Remove the Turkey Without Splashing
When brining is complete, open the bag carefully and lift the turkey out over the container. Allow excess liquid to drain before transferring the bird to a clean roasting pan.
Discard the used brine. Never reuse it as a sauce or marinade unless it has been handled and cooked according to a reliable food-safety procedure.
Avoid rinsing raw turkey in the sink. Splashing water can spread bacteria onto nearby surfaces, utensils, and food. Instead, pat the turkey dry with clean paper towels and discard them immediately.
7. Clean Up Safely
Wash your hands with soap and water after handling raw poultry. Clean and sanitize the container, roasting pan, sink area, and any surfaces that may have contacted raw turkey or brine.
If you want crispier skin, let the turkey rest uncovered in the refrigerator for several hours after removing it from the brine, provided you can store it safely and have enough time before cooking.
Before roasting, check whether the turkey was already injected with a salt solution or labeled as enhanced, kosher, or self-basting. These birds may already contain substantial salt, so an additional wet brine could make the meat too salty.
Want an Even Easier Option? Try Dry Brining
Dry brining is ideal when you want to skip the liquid altogether. It takes up less space, eliminates the risk of a brine spill, and can help produce beautifully browned skin.
Here’s how to do it:
- Pat the fully thawed turkey dry with paper towels.
- Apply salt evenly over the skin and, where accessible, beneath the skin of the breast and thighs.
- Add optional seasonings such as black pepper, thyme, rosemary, or a little lemon zest.
- Place the turkey on a rack set over a rimmed baking sheet.
- Refrigerate uncovered for the period specified by your dry-brining recipe, often 24–48 hours for a whole turkey.
- Roast according to a reliable recipe, without automatically adding more salt.
Use a tested dry-brining recipe with the correct salt quantity for your turkey’s weight. If the turkey is already salted or enhanced, reduce or skip the added salt as appropriate.
Common Turkey-Brining Mistakes to Avoid
Even a simple brine can go wrong if you overlook a few details.
- Using too much salt: Excessive salt or an overly long brining time can leave turkey unpleasantly salty.
- Brining a frozen turkey: Thaw the bird safely in the refrigerator before beginning a planned brine.
- Using a container that is too small: Overfilling makes spills more likely and prevents the turkey from being properly surrounded by brine.
- Leaving the turkey out overnight: Raw poultry must remain at a safe temperature during brining.
- Rinsing raw poultry: This can spread bacteria around the kitchen without making the turkey safer.
- Brining an already salted turkey without checking: Enhanced and self-basting birds may not need additional salt.
- Forgetting to dry the skin: Excess surface moisture can interfere with browning, especially after wet brining.
How to Know When Your Turkey Is Ready to Roast
After brining, the turkey should be drained, patted dry, and prepared according to your roasting recipe. Add butter, oil, herbs, or other seasonings as desired, remembering that the meat has already absorbed salt.
Use a food thermometer rather than relying on color or cooking time alone. The thickest part of the breast and the innermost part of the thigh and wing should reach at least 165°F (74°C). Avoid touching bone with the thermometer probe.
Allow the turkey to rest before carving so the juices can redistribute and serving is easier.
Final Thoughts
Brining a turkey doesn’t have to mean dealing with salty puddles, a crowded sink, or a refrigerator full of worry. A sturdy container, a food-safe brining bag, chilled liquid, and a little advance planning can make wet brining much easier to manage.
If you want the simplest, cleanest approach, dry brining is an excellent alternative. Either way, keeping the turkey cold, measuring the salt carefully, and using a thermometer will help you serve a flavorful, juicy centerpiece with far less stress.