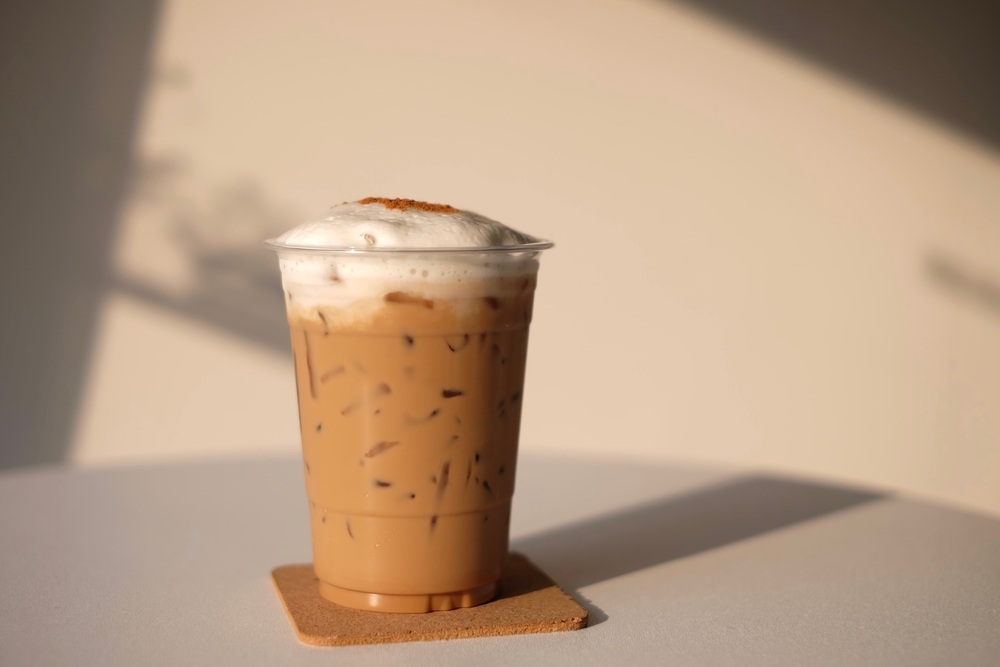
Love the creamy, cloud-like topping on your favorite coffee-shop iced latte? That smooth layer of cold foam makes an ordinary cup of coffee feel like a special treat. The best part is that you don’t need an expensive espresso machine or a fancy milk frother to make it at home.
With a few everyday ingredients and a simple kitchen tool, you can whip up delicious cold foam in minutes. Whether you prefer classic vanilla, a hint of caramel, or a rich sweet cream topping, there are plenty of ways to recreate that coffee-shop experience without leaving your kitchen.
Ready to upgrade your morning coffee? Here’s how to make cold foam at home using tools you probably already own.
What Is Cold Foam?
Cold foam is a light, creamy milk topping served over cold coffee drinks. Unlike steamed milk, which is heated and often used in hot lattes and cappuccinos, cold foam is prepared with cold ingredients and whipped until it becomes airy and smooth.
It sits on top of iced coffee, cold brew, and iced lattes, gradually blending into the drink as you sip. The result is a creamy first sip without the need for hot milk or a thick layer of whipped cream.
Coffee shops use different recipes, but cold foam generally combines milk, a creamier dairy ingredient, or a prepared sweet cream with a little sweetener. The exact texture depends on the ingredients and how much air you incorporate.
Ingredients You Need to Make Cold Foam at Home
You don’t need a long shopping list to make a delicious batch. Start with this simple recipe, then adjust it to suit your taste.
Ingredients
- ¼ cup (60 ml) cold milk
- 2 tablespoons (30 ml) cold heavy cream
- 1–2 teaspoons sugar, simple syrup, or vanilla syrup
- ¼ teaspoon vanilla extract, optional
Milk provides the bubbles, while heavy cream adds body and a smoother texture. The sweetener gives the foam that familiar coffee-shop flavor.
For a lighter version, use milk without the heavy cream. It may produce a less stable foam, but it can still make a pleasant topping. For a dairy-free option, try a barista-style oat milk or another plant-based milk specifically formulated for foaming.
How to Make Cold Foam Without a Frother
The secret isn’t expensive equipment. It’s using cold ingredients and choosing a method that traps enough air in the milk mixture.
Method 1: Use a French Press
A French press is one of the easiest tools for making cold foam because its plunger quickly aerates the milk.
Here’s what to do:
- Pour the cold milk, heavy cream, and sweetener into a clean French press. Leave plenty of room at the top because the mixture will expand.
- Place the lid on the press and move the plunger up and down briskly.
- Continue for about 20–45 seconds, checking the texture as you go.
- Stop when the mixture looks airy, creamy, and slightly thickened.
- Spoon or pour the foam over your iced coffee immediately.
Avoid filling the French press too high, and keep the lid securely in place while pumping. The mixture can expand surprisingly quickly.
Method 2: Use a Jar With a Tight-Fitting Lid
No French press? A simple jar can do the job, too. This method is especially convenient if you want to avoid washing extra equipment.
Follow these steps:
- Add the cold milk, cream, and sweetener to a clean jar with a secure lid.
- Leave at least half the jar empty so the liquid has space to expand.
- Close the lid tightly and shake vigorously for 45–90 seconds.
- Check whether the mixture has developed a foamy layer.
- Pour or spoon it onto your cold coffee.
This method produces a foam that may be a little less uniform than one made with a French press, but it’s an easy option for everyday coffee.
Safety tip: Use a sturdy jar intended for food storage, check that the lid is secure, and avoid shaking a completely full container.
Method 3: Use a Hand Whisk
A regular hand whisk works well if you don’t mind putting in a little effort.
- Combine the cold milk, heavy cream, and sweetener in a narrow bowl or measuring jug.
- Hold the whisk at a slight angle and whisk quickly.
- Continue for approximately 1–2 minutes, checking the consistency as you go.
- Stop once the mixture becomes visibly foamy and develops a light, creamy texture.
- Add it to your iced coffee before the foam begins to settle.
A small balloon whisk is particularly helpful because it can incorporate air more efficiently than a large, heavy whisk.
Method 4: Use an Electric Hand Mixer
If you already have a hand mixer, you can make cold foam with very little effort.
- Pour the chilled ingredients into a deep bowl or tall container.
- Start the mixer on low speed to avoid splashing.
- Increase to medium speed and beat until the mixture thickens slightly.
- Stop as soon as it becomes fluffy and pourable.
Keep an eye on the texture. If you beat a cream-heavy mixture for too long, it can become closer to whipped cream than the silky foam you want for coffee.
How to Make Vanilla Sweet Cream Cold Foam
Vanilla sweet cream cold foam is a popular choice for anyone who enjoys a creamy, slightly sweet coffee topping.
Ingredients
- ¼ cup (60 ml) cold milk
- 2 tablespoons (30 ml) cold heavy cream
- 1–2 teaspoons vanilla syrup
- A small pinch of salt, optional
Instructions
- Combine the milk, cream, vanilla syrup, and optional salt in a jar or French press.
- Whisk, shake, or pump until the mixture becomes light and foamy.
- Fill a glass with ice and pour in your favorite cold brew or iced coffee.
- Gently spoon the vanilla foam over the top.
- Finish with a light sprinkle of cinnamon if desired.
For a more pronounced vanilla flavor, add a few drops of vanilla extract. Start with a small amount so the extract doesn’t overpower the coffee.
How to Get That Perfect Coffee-Shop Texture
Making cold foam is easy, but a few small adjustments can make a noticeable difference.
Start with cold ingredients. Chilled milk and cream generally produce better results for cold foam and help the finished topping stay cool.
Choose the right milk. Whole milk creates a creamy foam, while lower-fat milk can produce lighter bubbles. A little heavy cream helps give the topping a richer texture.
Don’t add too much sweetener. Excessive syrup can change the consistency and make the mixture harder to aerate. Start with a teaspoon and adjust after tasting.
Use a narrow container. A narrow jar, measuring jug, or French press makes it easier to incorporate air without splashing.
Stop before it gets too thick. Cold foam should be soft, smooth, and pourable. If it holds stiff peaks like cake frosting, you’ve probably whipped it too far.
Use it right away. Homemade cold foam gradually loses its airy texture. For the prettiest result, prepare it just before serving.
Can You Make Cold Foam With Milk Alone?
Absolutely! You can make cold foam using just milk, although the results depend on its fat content, protein content, and how effectively you whip it.
Low-fat milk often creates a lighter, airier foam, while whole milk tends to produce a creamier texture. Neither result is guaranteed to match the thick, sweet cream foam found at every coffee shop.
If you’re using milk alone, pour a small amount into a jar or French press and aerate it until it becomes foamy. Add a little vanilla syrup if you prefer a sweeter topping.
Barista-style plant-based milks are another option. These products are formulated to improve texture in coffee, although some brands foam better than others. Regular plant-based milk may create larger bubbles or a thinner topping.
Fun Cold Foam Flavors to Try
Once you’ve mastered the basic recipe, you can experiment with different flavors without changing your technique.
- Caramel cold foam: Add caramel syrup and finish with a light caramel drizzle.
- Cinnamon vanilla foam: Mix in vanilla syrup and a small pinch of ground cinnamon.
- Chocolate cold foam: Add a little chocolate syrup and whisk until evenly combined.
- Maple cold foam: Replace the usual sweetener with a small amount of maple syrup.
- Cocoa cinnamon foam: Combine a little unsweetened cocoa powder, cinnamon, and sweetener for a dessert-inspired topping.
For powdered ingredients, mix thoroughly before aerating to prevent lumps. Add strong flavorings gradually so the foam remains balanced rather than overly sweet.
Common Cold Foam Mistakes to Avoid
Even a simple recipe can be disappointing if the ingredients or technique aren’t quite right.
- Using warm milk: Warm ingredients may not give you the same refreshing result as properly chilled milk.
- Overfilling the jar: The mixture needs room to expand as air is incorporated.
- Whipping for too long: Excessive whipping can make the foam too thick or cause cream to separate.
- Expecting identical results from every milk: Different brands and formulations behave differently.
- Making it too far in advance: Foam gradually collapses, so it’s best prepared immediately before serving.
- Adding too much syrup: Too much liquid sweetener can make the mixture thinner and more difficult to foam.
Can You Make Cold Foam Ahead of Time?
You can mix the milk, cream, and flavorings ahead of time and keep the mixture covered in the refrigerator. However, it’s best to whip it just before serving for the freshest texture.
If you have leftover foam, refrigerate it promptly in a clean, covered container and use it within the safe storage period for the dairy ingredients. Whip it again briefly if it has settled, and discard it if it has been left out too long or shows signs of spoilage.
Avoid leaving milk-based foam at room temperature for more than two hours, or more than one hour when temperatures are above 90°F (32°C).
Final Thoughts
You don’t need a fancy frother to enjoy coffee-shop-style cold foam at home. A French press, a tightly sealed jar, a hand whisk, or an electric mixer can all help you create a creamy topping with everyday ingredients.
Start with cold milk, a little cream, and your favorite sweetener. Experiment with different flavors, adjust the sweetness to your liking, and pour your homemade foam over iced coffee or cold brew for an easy upgrade.
Once you find your favorite combination, your daily coffee can feel like a coffee-shop treat without the extra expense or trip out of the house.