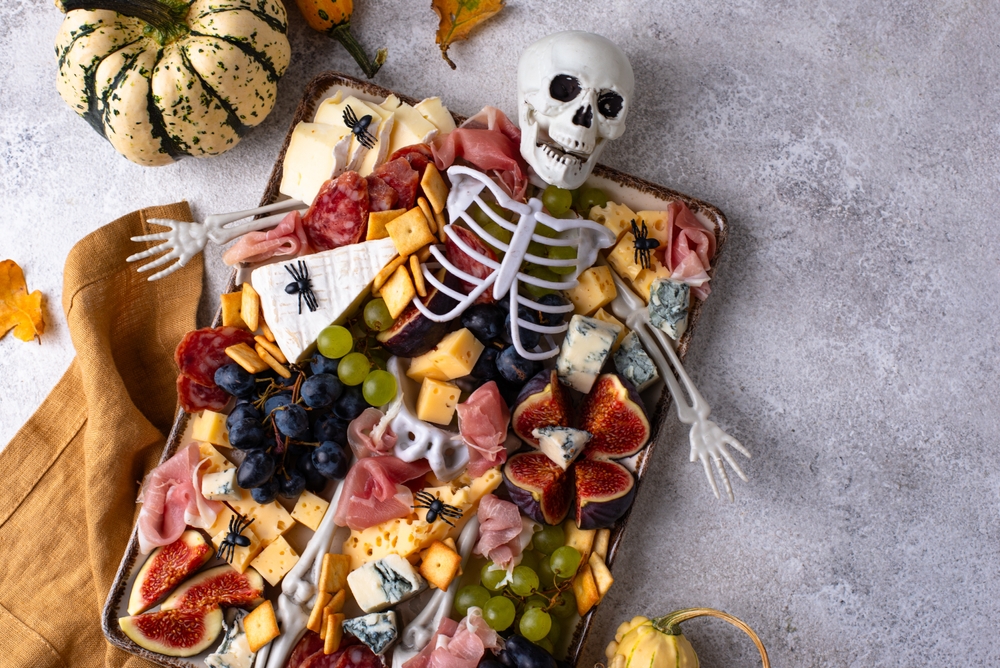
Halloween parties have a way of sneaking up on you. One minute it’s early October and you’re planning something fun, and the next it’s the 31st and you’re staring at the kitchen wondering what to serve. A Halloween charcuterie board is a good fix. There’s no oven, no recipe, and no fancy skills needed, just a bit of assembling and some spooky styling.
This year Halloween lands on a Saturday, so the board can double as the centerpiece of a weekend party. Here’s how to get one on the table in 15 minutes.
Before You Start: The Quick Plan
You only need five things:
- A big surface: a cutting board, a baking sheet lined with parchment, or a platter. Black or dark wood makes the colors pop.
- Cheese: 3 types
- Meat or a savory protein: 1 to 2 types
- Crunch: crackers, pretzels, or breadsticks
- Something sweet and something fresh: candy, fruit, and veggies
Keep the colors dark and moody (black, orange, purple, white, with a splash of green) and the theme takes care of itself.
Your Shopping List
Cheese
- Cheddar, sliced or in blocks (orange is a ready-made Halloween color)
- Mozzarella pearls or small fresh mozzarella balls
- Brie or a soft creamy cheese for spreading
Savory
- Salami or pepperoni slices
- Prosciutto (optional, but great for wrapping)
- String cheese sticks
Crunch
- Crackers (a dark rye or black-seed variety looks great)
- Pretzel sticks
- Breadsticks
Fresh and sweet
- Black olives
- Purple grapes or blackberries
- Baby carrots or orange bell pepper strips
- Clementine segments
- Candy corn, chocolate-covered pretzels, or mini candy bars
Dips
- Hummus, spinach dip, or ranch
- Fig jam or honey
You can swap anything here for what you already have. The board is meant to be flexible.
The 15-Minute Build
Minutes 1 to 3: Set the Stage
Put out your board and place your dips in small bowls first, since they’re the anchors everything else arranges around. Put them in a loose triangle rather than in a straight line. If you have a mini cauldron, a small black pot, or even a mason jar, use it as a dip bowl for instant theme points.
Minutes 4 to 7: Add the Cheese
Cluster each cheese in its own area so people can find what they like:
- Slice the cheddar into triangles. Stack them in a row so they look like candy corn when you add a few white cheese bits on top.
- Pile the mozzarella pearls in a group. These become your “eyeballs” in a minute.
- Place the brie wedge near a dip bowl and spoon a little jam on top. It looks gooey and delicious.
Minutes 8 to 10: Layer the Meats and Crunch
Fold salami slices in half and then half again, and fan them in a curved line. A curved line looks more natural than a stiff row. Tuck pretzel sticks and breadsticks upright in a small glass or lay them in a pile near the edge. Fill the crackers in next, leaving small gaps where the veggies and fruit will go.
Minutes 11 to 13: Fill the Gaps with Color
This is where the board starts to look polished. Tuck grapes, blackberries, carrots, and clementine segments into the empty spaces. If you can see board underneath, fill it. A full board looks generous and professional.
Minutes 14 to 15: Add the Spooky Touches
These small details are what make it feel like Halloween:
- Eyeballs: Press a slice of black olive onto each mozzarella pearl. A tiny dab of cream cheese or hummus helps it stick.
- Spiders: Cut a black olive in half. One half is the body, and you can slice the other half into thin strips for legs. Place the spiders on the cheese or crackers.
- Witch brooms: Cut a string cheese stick into 2-inch pieces, make small snips on one end for the bristles, and push a pretzel stick into the other end.
- Mummies: Wrap thin strips of prosciutto around a piece of string cheese, leaving a gap for two small olive “eyes.”
- Candy corn row: Scatter candy corn near the cheddar for a pop of sweetness.
Finish by scattering a few candy pieces in the last gaps, and you’re done.
Tips to Make It Look (and Taste) Even Better
Take cheese out about 20 minutes before serving. Cold cheese is firm and a little flat in flavor. Slightly softer cheese tastes better.
Use height. Prop up a few crackers, stand breadsticks in a glass, or stack cheese on a small bowl. A flat board looks plain, but a layered one looks impressive.
Mix salty and sweet. The pairing of cheddar with a sweet fig jam or a salami slice with a grape is what people go back for, and it makes the board feel more thoughtful.
Label allergens if you’re hosting a crowd. A couple of small tags or toothpick flags make it easy for guests to spot nuts, dairy, or gluten. It’s a small step that helps everyone relax and enjoy.
Check with kids and picky eaters. Add a safe, plain option, like pretzels or plain crackers, so there’s always something familiar.
Food Safety Basics
A board is meant to sit out, but not forever. Perishable foods like cheese, meat, and dips should stay out no more than about two hours at room temperature, and less if the room is warm. If your party runs long, keep a backup board in the fridge and swap it in halfway through, or set out refills in smaller amounts. Use separate serving utensils for each item so guests don’t cross-contaminate.
Make-Ahead Shortcut
If your day is packed, you can prep most of this ahead of time:
- Slice cheese and meats the day before and store them in airtight containers.
- Wash and cut the fruit and veggies in the morning.
- Do the final assembly just before guests arrive. Crackers and pretzels go on last to keep them crisp.
That way the 15 minutes becomes more like 5 on party day.
Fun Variations to Try
- Kid-friendly board: Skip the strong cheeses and focus on cheddar cubes, pretzels, grapes, and candy. Use cookie cutters to turn cheese slices into bats and pumpkins.
- Dessert board: Swap the savory items for brownies, chocolate bark, popcorn, and gummy worms. Add whipped cream or chocolate dip.
- Vegetarian board: Replace the meats with roasted nuts, marinated artichokes, and extra cheeses.
- Grown-up board: Add dark chocolate, spiced nuts, and a bold cheese like blue, and serve it with a sparkling drink.
The Bottom Line
A great Halloween charcuterie board doesn’t need to be complicated. Pick a spooky color palette, group your foods, fill every gap, and add a few playful details like olive eyeballs and pretzel brooms. In about 15 minutes you’ll have a board that looks like it took hours, and guests will be too busy snacking to notice how easy it was.
Happy Halloween, and happy snacking!